Does your lawn mower suddenly lose power halfway through mowing, or even emit a burning smell? This is usually a distress signal from your deck belt! When that happens, SWR (San Wu Rubber) lawn mower belts have you covered.
SWR lawn mower belts feature high-strength aramid cords and heat-resistant chloroprene rubber (CR). Designed with protective qualities that offer tensile strength, wear resistance, and stable power transmission, they effectively prevent belt slippage, breakage, and heat-induced deformation or aging—making them absolutely your best choice!
Today, we're sharing the complete pre-installation inspection and selection guide for SWR lawn mower belts! We have divided the process into the following 3 key steps:
- Confirm Belt Size Before Purchase
- 4 Key Pre-Installation Pulley Checks
- Quick-Start Installation & Testing
By mastering these essential tips, even beginners can easily handle the job without making common mistakes!
Step 1: Confirm Belt Size Before Purchase (So You Don’t Waste Your Time!)
When it’s time to replace a belt, the most common issue people face is: "The old belt is worn out, but I don’t know which one to buy." If the size or specifications are incorrect, even if it looks similar, it may fail to operate properly after installation and could even affect machine operation.
Therefore, confirming the size and specifications of the used belt before purchasing a new one is the most crucial first step.
Don’t worry—confirming the belt size is not complicated. With simple measuring tools and the following three steps, you can accurately find the right belt size and specifications.
(1) Measure Belt Length — Confirm the Belt's Outside Circumference
First, remove the old belt from the pulleys, then lay the used belt flat and use a tape measure along the outside circumference to confirm the correct length (Figure 1-1).
When measuring, keep the tape measure snug against the outside circumference of the belt without over-tightening to avoid measurement errors.
(2) Measure Belt Width — Use a Caliper to Confirm Belt Width
After confirming the belt length, measure the belt width next. It is recommended to use a caliper to gently clamp the belt body and measure the belt width to confirm the actual dimensions (Figure 1-2).
(3) Check the Belt Length Marking — Confirm the Printed Belt Size
In addition to physical measurements, checking the printed markings on the belt is one of the fastest ways to confirm the correct specifications.
Many belts have the model or size printed directly on the surface, such as "5L-1630" and other specification markings. As long as the markings on the used belt are still legible, you can record these specifications and cross-reference them with the new belt's product specifications (Figure 1-3).
If the original belt packaging is still available, you can also check the specification details on the packaging.
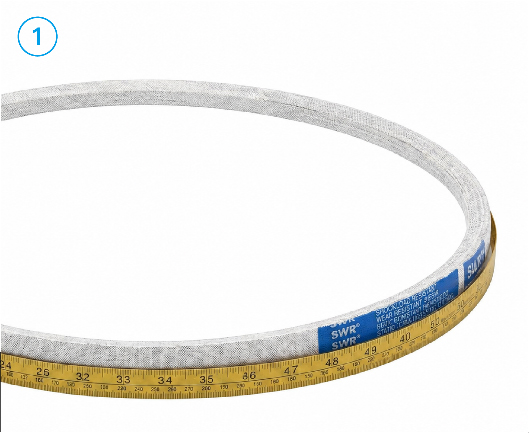
(Figure 1-1)
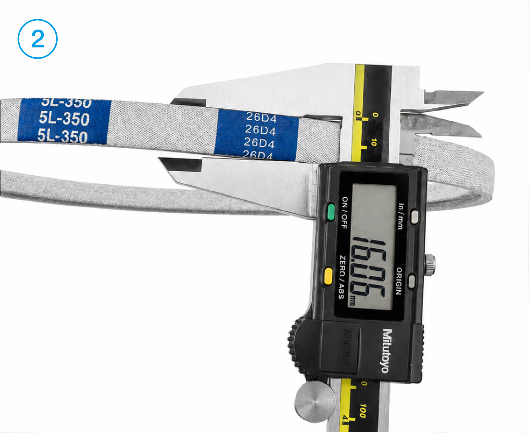
(Figure 1-2)
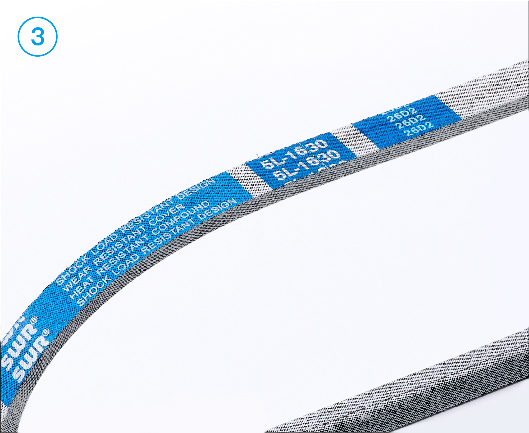
(Figure 1-3)
By following these three steps to thoroughly verify the belt length, belt width, and printed belt size markings, you can significantly reduce the risk of choosing the wrong belt.
In the next section, we’ll walk you through the 4 key pre-installation pulley checks!
Step 2: 4 Key Pulley Checks Before Installing the New Belt (The Key to Ensuring Belt Longevity!)
You’ve got the right new belt, confirmed the specifications—so can you install it right away?
Not so fast!
When replacing a belt, many people focus only on the new belt itself, overlooking the pulleys, pulley grooves, and tensioner assembly. If surrounding components are worn, sticking, or packed with accumulated debris, even a brand-new belt will suffer accelerated wear due to poor operating conditions.
Therefore, before installing the new belt, it is strongly recommended to spend a few minutes inspecting the machine’s condition.

Check Pulley Rotation
First, confirm whether each pulley rotates normally.
With the machine powered off and secured safely, spin the pulleys by hand to feel if they rotate smoothly. Pay close attention to any signs of sticking, rough rotation, excessive play, or noticeable wobbling.
If you feel significant resistance or hear abnormal noises while spinning the pulleys, find and resolve the root cause before installing the new belt.

Inspect and Clean Pulley Surfaces
After confirming the pulleys rotate normally, inspect the pulley contact surfaces next.
Carefully check the pulleys for rust, sharp edges, burrs, nicks, or noticeable wear. If there is dirt or buildup on the surface, clean it thoroughly before proceeding.
Because the belt remains in continuous contact with the pulleys during operation, any sharp debris, burrs, or severe wear on the pulley surfaces can cause premature belt wear and damage.

Clear Residual Debris from Pulley Grooves
The pulley grooves are the primary contact surfaces where the belt runs, making them one of the most common areas for debris to accumulate.
Especially in agricultural or outdoor equipment environments, prolonged operation often leads to mud, grass clippings, dirt, and other debris getting packed into the grooves.
Before installing the new belt, thoroughly clear all debris from the pulley grooves and make sure they remain clean. This prevents foreign matter from disrupting proper contact between the belt and pulleys.

Inspect the Tensioner and Spring Condition
Most important, don’t forget to inspect the tensioner and its spring.
The tensioning system is responsible for maintaining proper belt tension during operation; therefore, the condition of the tensioner is just as critical as the belt itself.
During inspection, check whether the spring shows signs of rust, visible distortion, fatigue, or overstretching, while verifying that the tensioner mechanism moves smoothly without sticking.
If the tensioner or spring is worn or compromised, it will fail to maintain proper operating tension, leading to belt slippage, excessive vibration, or premature wear.
A new belt’s lifespan depends on more than just the belt itself.
Inspecting all surrounding components and ensuring optimal operating conditions is the key to achieving peak belt performance and maximum service life.
In the next section, we’ll show you how to quickly install your new belt and conduct a proper belt test!
Step 3: Quick Installation and Testing
After completing the inspection of the pulleys and tensioning system, you are ready to install the new belt.
However, getting the belt on doesn’t necessarily mean it’s installed correctly. If the routing path, belt alignment, or tension is off, even a belt with the exact right specifications can suffer from slippage, misalignment, or premature wear once the machine starts running.
Therefore, do not rush through the installation. Follow the equipment's original routing diagram step by step, verify that the belt is properly seated in every pulley groove, and then proceed with tension adjustment and test runs.
(1) Clean and Inspect the Pulley Assemblies
Before installation, make sure to complete the "4 Key Pulley Checks" covered in the previous section. Verify that the pulleys spin smoothly without resistance, the pulley surfaces have no visible damage or burrs, and the grooves are thoroughly cleared of mud, grass clippings, and other debris. Additionally, confirm that the tensioner and its spring are in proper working condition. (Figure 3-1)
Once all surrounding components are verified to be in good order, proceed with installing the new belt.
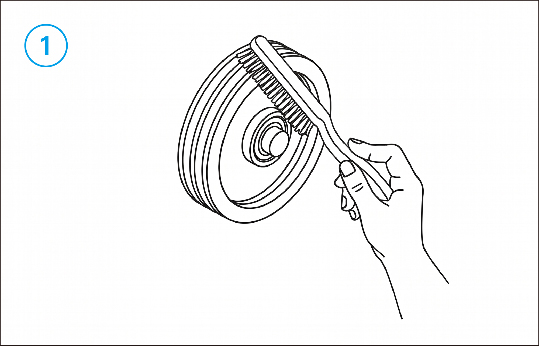
(Figure 3-1) Clean and Inspect the Pulley Assemblies
(Figure 3-2) Route the Drive Belt Correctly
(2) Route the Drive Belt Correctly
After confirming the machine's condition, proceed to install the belt along its original routing path. (Figure 3-2)
- Refer to the equipment’s original routing diagram and route the belt around each pulley in sequence.
- During installation, verify that the belt orientation and path are correct, ensuring the belt is not routed improperly or twisted.
- If the machine is equipped with an idler or tensioner pulley, release tension first to create sufficient clearance, route the belt smoothly into position, and then re-engage tension.
- Never use a screwdriver, pry bar, or other tools to force the belt onto the pulleys. Forcing the belt can damage its edges, tensile cords, and internal structure. Even if no external damage is visible, it can significantly compromise belt performance and durability.
(3) Verify Belt Seating and Alignment
Once the belt is routed, do not rush to start the machine.
Check each pulley individually to confirm that the belt is fully seated in the pulley grooves, making sure there is no twisting, jumping out of the grooves, misalignment, or improper seating.
Next, rotate the drive system by hand for 1 to 2 full revolutions. Observe the belt's travel path and verify that the belt maintains proper tracking, clearance, and alignment across all drive pulleys, idler pulleys, and belt guides. (Figure 3-3)
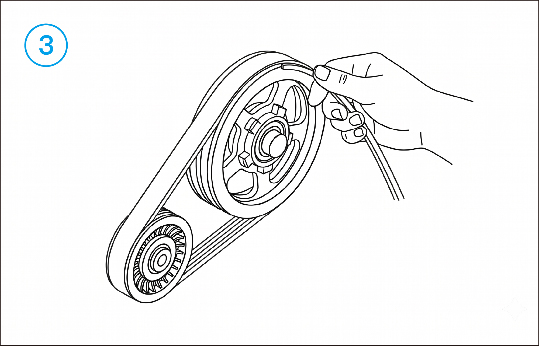
(Figure 3-3) Verify Belt Seating and Alignment
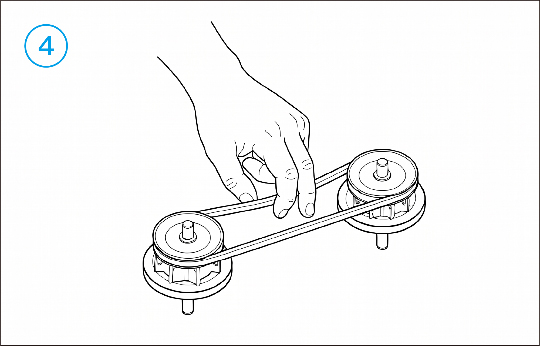
(Figure 3-4) Check and Adjust Belt Tension
(4) Check and Adjust Belt Tension
After verifying that the belt is correctly seated, the final step is adjusting it to the proper tension.
First, confirm that the tensioner pulley and tension spring operate smoothly, showing no signs of noticeable fatigue, distortion, or overstretching.
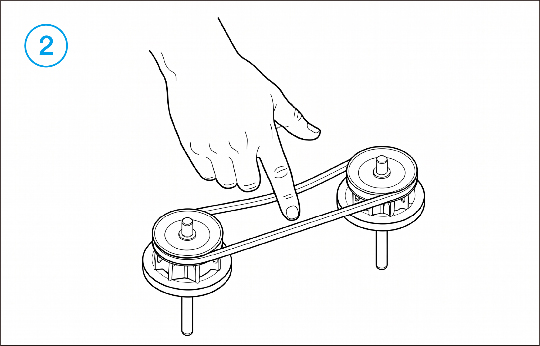
Next, check the belt tension according to the manufacturer's specifications. If the equipment specifies a required tension value, always use the factory specification as your primary reference. If specialized measuring tools are unavailable, you can also check belt deflection by pressing down firmly at the center span between pulleys, ensuring it falls within the equipment's recommended range. (Figure 3-4)
If the belt tension is too low, it can lead to belt slippage, fluttering, or unstable operation; if the tension is too high, it exerts excessive load on the belt, bearings, and adjacent components.
Remember: tighter is not always better—achieving proper tension is what matters.
Choose Right, Install Right: Unlock Peak Belt Performance
From size verification and pre-installation inspections to proper routing and tension adjustment, every single step directly impacts belt performance.
Selecting the right belt and installing it correctly ensures smoother equipment operation and maximizes belt service life.
Stays tight under tension. Resists breaking under heavy use. Keeps your mower running smoothly. Available in 3L, 4L, and 5L sizes to fit your needs.
With 80 years of manufacturing expertise and a commitment to quality, SWR belts are designed for your peace of mind.